Amazon CodeCatalyst is a modern software development service that empowers teams to deliver software on AWS easily and quickly. Amazon CodeCatalyst provides one place where you can plan, code, and build, test, and deploy your container applications with continuous integration/continuous delivery (CI/CD) tools.
In this post, we will walk-through how you can configure Blue/Green and canary deployments for your container workloads within Amazon CodeCatalyst.
Pre-requisites
To follow along with the instructions, you’ll need:
- An AWS account. If you don’t have one, you can create a new AWS account.
- An Amazon Elastic Container Service (Amazon ECS) service using the Blue/Green deployment type. If you don’t have one, follow the Amazon ECS tutorial and complete steps 1-5.
- An Amazon Elastic Container Registry (Amazon ECR) repository named
codecatalyst-ecs-image-repo. Follow the Amazon ECR user guide to create one. - An Amazon CodeCatalyst space, with an empty Amazon CodeCatalyst project named
codecatalyst-ecs-projectand an Amazon CodeCatalyst environment calledcodecatalyst-ecs-environment. Follow the Amazon CodeCatalyst tutorial to set these up. - Follow the Amazon CodeCatalyst user guide to associate your account to the environment.
Walkthrough
Now that you have setup an Amazon ECS cluster and configured Amazon CodeCatalyst to perform deployments, you can configure Blue/Green deployment for your workload. Here are the high-level steps:
- Collect details of the Amazon ECS environment that you created in the prerequisites step.
- Add source files for the containerized application to Amazon CodeCatalyst.
- Create Amazon CodeCatalyst Workflow.
- Validate the setup.
Step 1: Collect details from your ECS service and Amazon CodeCatalyst role
In this step, you will collect information from your prerequisites that will be used in the Blue/Green Amazon CodeCatalyst configuration further down this post.
If you followed the prerequisites tutorial, below are AWS CLI commands to extract values that are used in this post. You can run this on your local workstation or with AWS CloudShell in the same region you created your Amazon ECS cluster.
ECSCLUSTER='tutorial-bluegreen-cluster'
ECSSERVICE='service-bluegreen'
ECSCLUSTERARN=$(aws ecs describe-clusters --clusters $ECSCLUSTER --query 'clusters[*].clusterArn' --output text)
ECSSERVICENAME=$(aws ecs describe-services --services $ECSSERVICE --cluster $ECSCLUSTER --query 'services[*].serviceName' --output text)
TASKDEFARN=$(aws ecs describe-services --services $ECSSERVICE --cluster $ECSCLUSTER --query 'services[*].taskDefinition' --output text)
TASKROLE=$(aws ecs describe-task-definition --task-definition tutorial-task-def --query 'taskDefinition.executionRoleArn' --output text)
ACCOUNT=$(aws sts get-caller-identity --query "Account" --output text)
echo Account_ID value: $ACCOUNT
echo EcsRegionName value: $AWS_DEFAULT_REGION
echo EcsClusterArn value: $ECSCLUSTERARN
echo EcsServiceName value: $ECSSERVICENAME
echo TaskDefinitionArn value: $TASKDEFARN
echo TaskExecutionRoleArn value: $TASKROLE
Note down the values of Account_ID, EcsRegionName, EcsClusterArn, EcsServiceName, TaskDefinitionArn and TaskExecutionRoleArn. You will need these values in later steps.
Step 2: Add Amazon IAM roles to Amazon CodeCatalyst
In this step, you will create a role called CodeCatalystWorkflowDevelopmentRole-spacename to provide Amazon CodeCatalyst service permissions to build and deploy applications. This role is only recommended for use with development accounts and uses the AdministratorAccess AWS managed policy, giving it full access to create new policies and resources in this AWS account.
- In Amazon CodeCatalyst, navigate to your space. Choose the Settings tab.
- In the Navigation page, select AWS accounts. A list of account connections appears. Choose the account connection that represents the AWS account where you created your build and deploy roles.
- Choose Manage roles from AWS management console.
- The Add IAM role to Amazon CodeCatalyst space page appears. You might need to sign in to access the page.
- Choose Create CodeCatalyst development administrator role in IAM. This option creates a service role that contains the permissions policy and trust policy for the development role.
- Note down the role name. Choose Create development role.
Step 3: Create Amazon CodeCatalyst source repository
In this step, you will create a source repository in CodeCatalyst. This repository stores the tutorial’s source files, such as the task definition file.
- In Amazon CodeCatalyst, navigate to your project.
- In the navigation pane, choose Code, and then choose Source repositories.
- Choose Add repository, and then choose Create repository.
- In Repository name, enter:
codecatalyst-advanced-deployment
- Choose Create.
Step 4: Create Amazon CodeCatalyst Dev Environment
In this step, you will create a Amazon CodeCatalyst Dev environment to work on the sample application code and configuration in the codecatalyst-advanced-deployment repository. Learn more about Amazon CodeCatalyst dev environments in Amazon CodeCatalyst user guide.
- In Amazon CodeCatalyst, navigate to your project.
- In the navigation pane, choose Code, and then choose Source repositories.
- Choose the source repository for which you want to create a dev environment.
- Choose Create Dev Environment.
- Choose AWS Cloud9 from the drop-down menu.
- In Create Dev Environment and open with AWS Cloud9 page (Figure 1), choose Create to create a Cloud9 development environment.
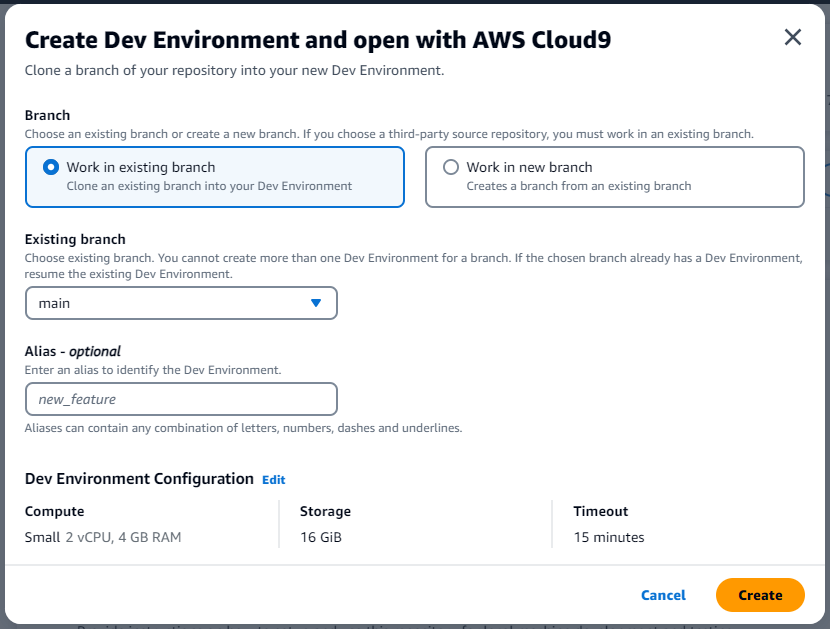
Figure 1: Create Dev Environment in Amazon CodeCatalyst
AWS Cloud9 IDE opens on a new browser tab. Stay in AWS Cloud9 window to continue with Step 5.
Step 5: Add Source files to Amazon CodeCatalyst source repository
In this step, you will add source files from a sample application from GitHub to Amazon CodeCatalyst repository. You will be using this application to configure and test blue-green deployments.
- On the menu bar at the top of the AWS Cloud9 IDE, choose Window, New Terminal or use an existing terminal window.
- Download the Github project as a zip file, un-compress it and move it to your project folder by running the below commands in the terminal.
cd codecatalyst-advanced-deployment
wget -O SampleApp.zip https://github.com/build-on-aws/automate-web-app-amazon-ecs-cdk-codecatalyst/zipball/main/
unzip SampleApp.zip
mv build-on-aws-automate-web-app-amazon-ecs-cdk-codecatalyst-*/SampleApp/* .
rm -rf build-on-aws-automate-web-app-amazon-ecs-cdk-codecatalyst-*
rm SampleApp.zip
- Update the task definition file for the sample application. Open task.json in the current directory. Find and replace “<arn:aws:iam::<account_ID>:role/AppRole> with the value collected from step 1: <TaskExecutionRoleArn>.
- Amazon CodeCatalyst works with AWS CodeDeploy to perform Blue/Green deployments on Amazon ECS. You will create an Application Specification file, which will be used by CodeDeploy to manage the deployment. Create a file named
appspec.yamlinside thecodecatalyst-advanced-deploymentdirectory. Update the <TaskDefinitionArn> with value from Step 1.
version: 0.0
Resources:
  - TargetService:
      Type: AWS::ECS::Service
      Properties:
        TaskDefinition: "<TaskDefinitionArn>"
        LoadBalancerInfo:
          ContainerName: "MyContainer"
          ContainerPort: 80
PlatformVersion: "LATEST"- Commit the changes to Amazon CodeCatalyst repository by following the below commands. Update <your_email> and <your_name> with your email and name.
git config user.email "<your_email>"
git config user.name "<your_name>"
git add .
git commit -m "Initial commit"
git push
Step 6: Create Amazon CodeCatalyst Workflow
In this step, you will create the Amazon CodeCatalyst workflow which will automatically build your source code when changes are made. A workflow is an automated procedure that describes how to build, test, and deploy your code as part of a continuous integration and continuous delivery (CI/CD) system. A workflow defines a series of steps, or actions, to take during a workflow run.
- In the navigation pane, choose CI/CD, and then choose Workflows.
- Choose Create workflow. Select codecatalyst-advanced-deployment from the Source repository dropdown.
- Choose main in the branch. Select Create (Figure 2). The workflow definition file appears in the Amazon CodeCatalyst console’s YAML editor.

Figure 2: Create workflow page in Amazon CodeCatalyst
- Update the workflow by replacing the contents in the YAML editor with the below. Replace <Account_ID> with your AWS account ID. Replace <EcsRegionName>, <EcsClusterArn>, <EcsServiceName> with values from Step 1. Replace <CodeCatalyst-Dev-Admin-Role> with the Role Name from Step 3.
Name: BuildAndDeployToECS
SchemaVersion: "1.0"
Set automatic triggers on code push.
Triggers:
- Type: Push
Branches:
- main
Actions:
Build_application:
Identifier: aws/build@v1
Inputs:
Sources:
- WorkflowSource
Variables:
- Name: region
Value: <EcsRegionName>
- Name: registry
Value: <Account_ID>.dkr.ecr.<EcsRegionName>.amazonaws.com
- Name: image
Value: codecatalyst-ecs-image-repo
Outputs:
AutoDiscoverReports:
Enabled: false
Variables:
- IMAGE
Compute:
Type: EC2
Environment:
Connections:
- Role: <CodeCatalystPreviewDevelopmentAdministrator role>
Name: "<Account_ID>"
Name: codecatalyst-ecs-environment
Configuration:
Steps:
- Run: export account=aws sts get-caller-identity --output text | awk '{ print $1 }'
- Run: aws ecr get-login-password --region ${region} | docker login --username AWS --password-stdin ${registry}
- Run: docker build -t appimage .
- Run: docker tag appimage ${registry}/${image}:${WorkflowSource.CommitId}
- Run: docker push --all-tags ${registry}/${image}
- Run: export IMAGE=${registry}/${image}:${WorkflowSource.CommitId}
RenderAmazonECStaskdefinition:
Identifier: aws/ecs-render-task-definition@v1
Configuration:
image: ${Build_application.IMAGE}
container-name: MyContainer
task-definition: task.json
Outputs:
Artifacts:
- Name: TaskDefinition
Files:
- task-definition*
DependsOn:
- Build_application
Inputs:
Sources:
- WorkflowSource
DeploytoAmazonECS:
Identifier: aws/ecs-deploy@v1
Configuration:
task-definition: /artifacts/DeploytoAmazonECS/TaskDefinition/${RenderAmazonECStaskdefinition.task-definition}
service: <EcsServiceName>
cluster: <EcsClusterArn>
region: <EcsRegionName>
codedeploy-appspec: appspec.yaml
codedeploy-application: tutorial-bluegreen-app
codedeploy-deployment-group: tutorial-bluegreen-dg
codedeploy-deployment-description: "Blue-green deployment for sample app"
Compute:
Type: EC2
Fleet: Linux.x86-64.Large
Environment:
Connections:
- Role: <CodeCatalyst-Dev-Admin-Role>
# Add account id within quotes. Eg: "12345678"
Name: "<Account_ID>"
Name: codecatalyst-ecs-environment
DependsOn:
- RenderAmazonECStaskdefinition
Inputs:
Artifacts:
- TaskDefinition
Sources:
- WorkflowSource
The workflow above does the following:
- Whenever a code change is pushed to the repository, a Build action is triggered. The Build action builds a container image and pushes the image to the Amazon ECR repository created in Step 1.
- Once the Build stage is complete, the Amazon ECS task definition is updated with the new ECR repository image.
- The DeploytoECS action then deploys the new image to Amazon ECS using Blue/Green Approach.
To confirm everything was configured correctly, choose the Validate button. It should add a green banner with The workflow definition is valid at the top.
Select Commit to add the workflow to the repository (Figure 3)
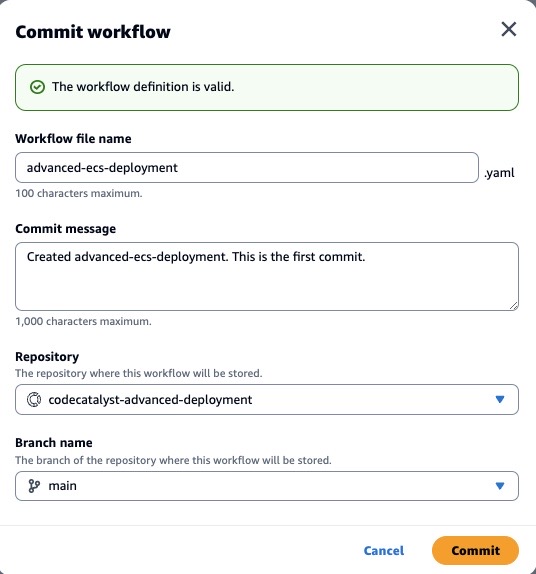
Figure 3: Commit workflow page in Amazon CodeCatalyst
The workflow file is stored in a ~/.codecatalyst/workflows/ folder in the root of your source repository. The file can have a .yml or .yaml extension.
Let’s review our work, using the load balancer’s URL that you created during prerequisites, paste it into your browser. Your page should look similar to (Figure 4).
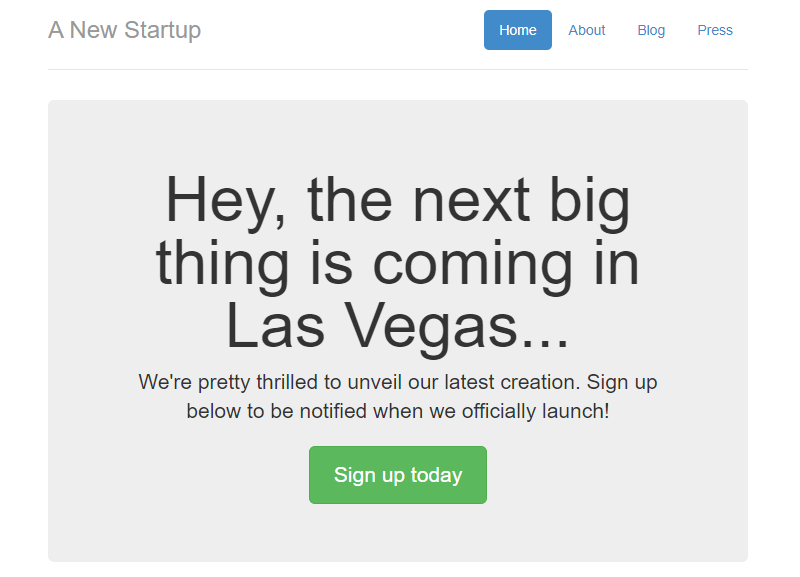
Figure 4: Sample Application (Blue version)
Step 7: Validate the setup
To validate the setup, you will make a small change to the sample application.
- Open Amazon CodeCatalyst dev environment that you created in Step 4.
- Update your local copy of the repository. In the terminal run the command below.
git pull
- In the terminal, navigate to
/templatesfolder. Open index.html and search for “Las Vegas”. Replace the word with “New York”. Save the file. - Commit the change to the repository using the commands below.
git add .
git commit -m "Updating the city to New York"
git push
After the change is committed, the workflow should start running automatically. You can monitor of the workflow run in Amazon CodeCatalyst console (Figure 5)
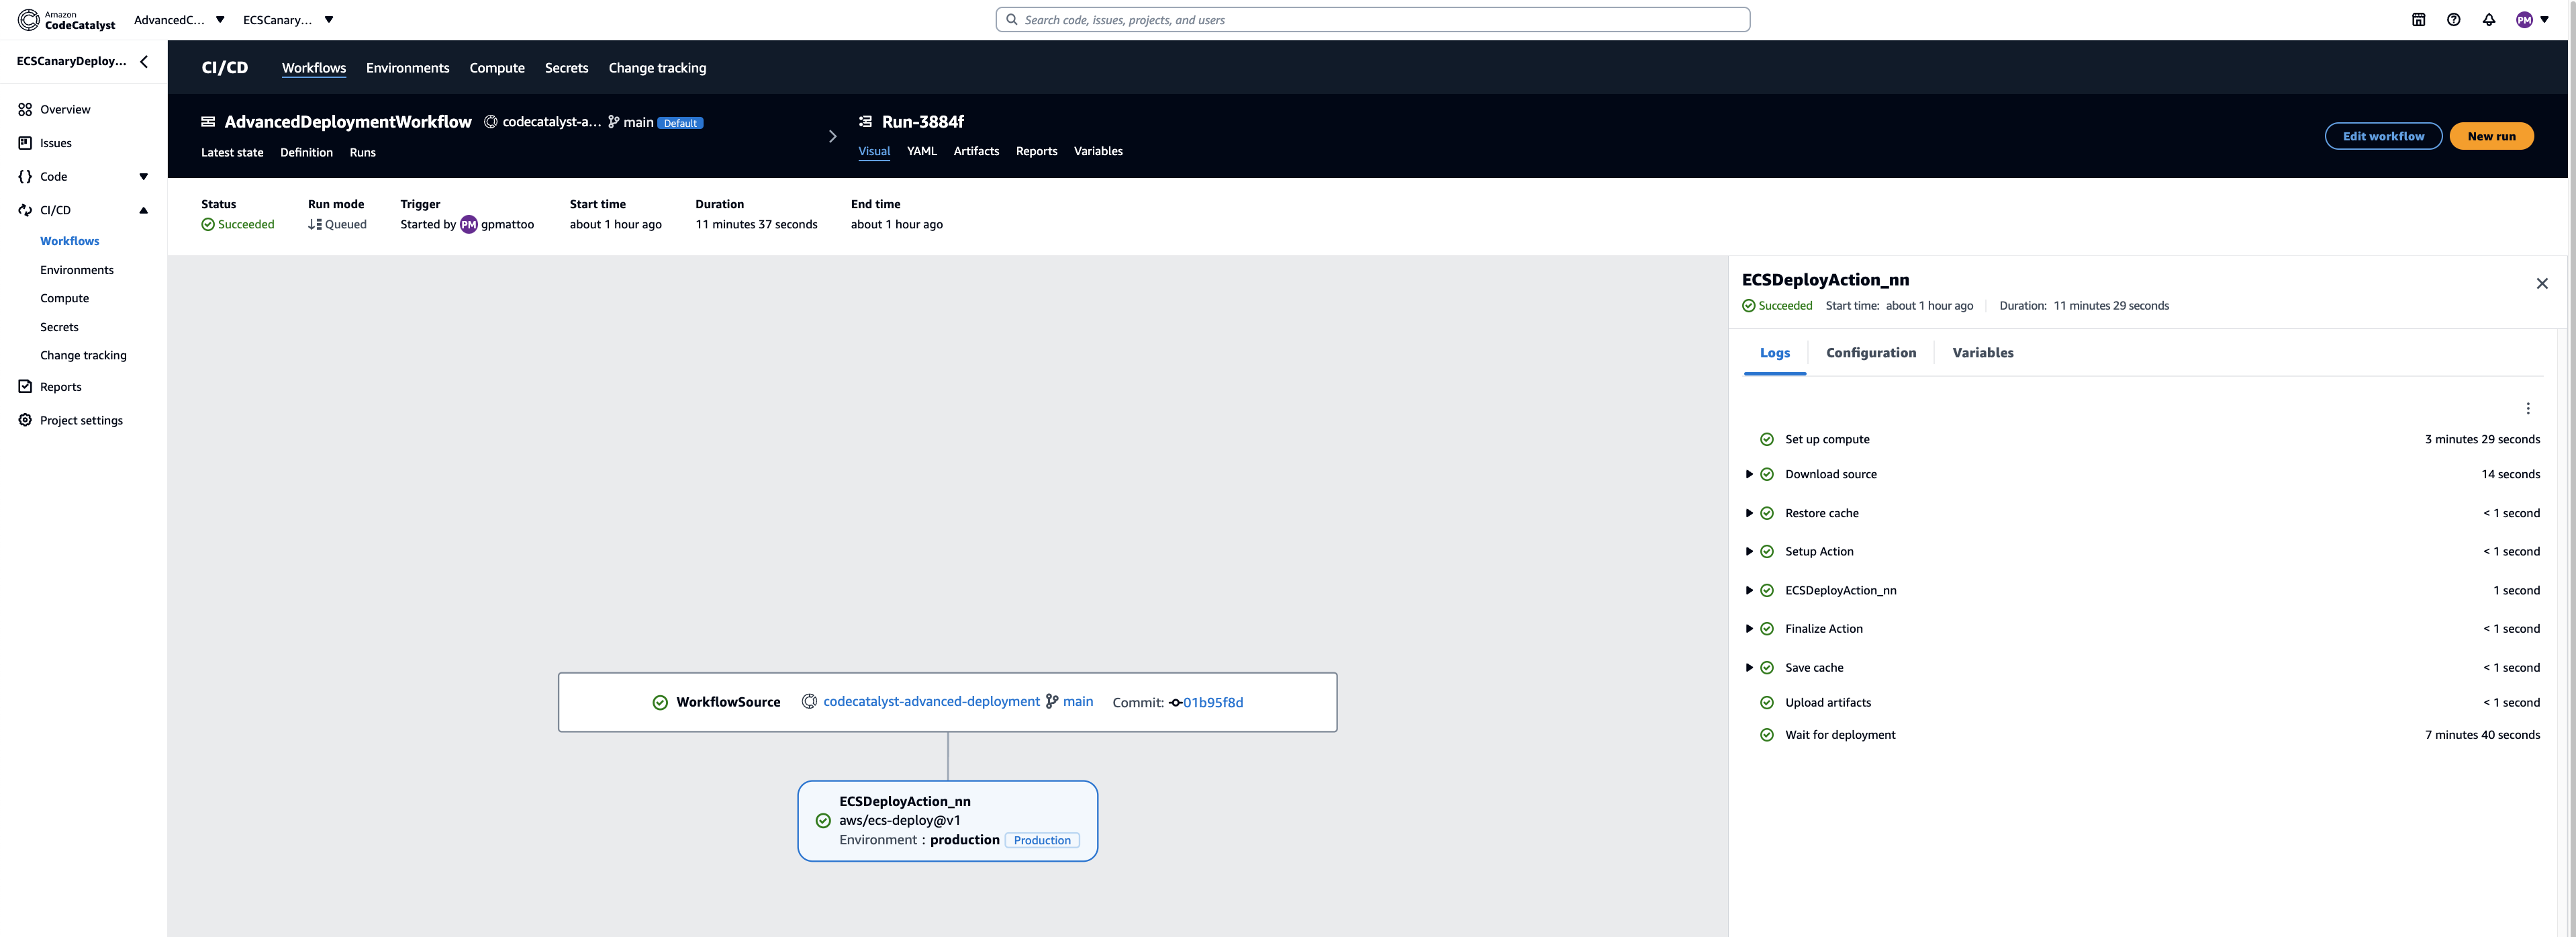
Figure 5: Blue/Green Deployment Progress on Amazon CodeCatalyst
You can also see the deployment status on the AWS CodeDeploy deployment page (Figure 6)
- Going back to the AWS console.
- In the upper left search bar, type in “CodeDeploy”.
- In the left hand menu, select Deployments.
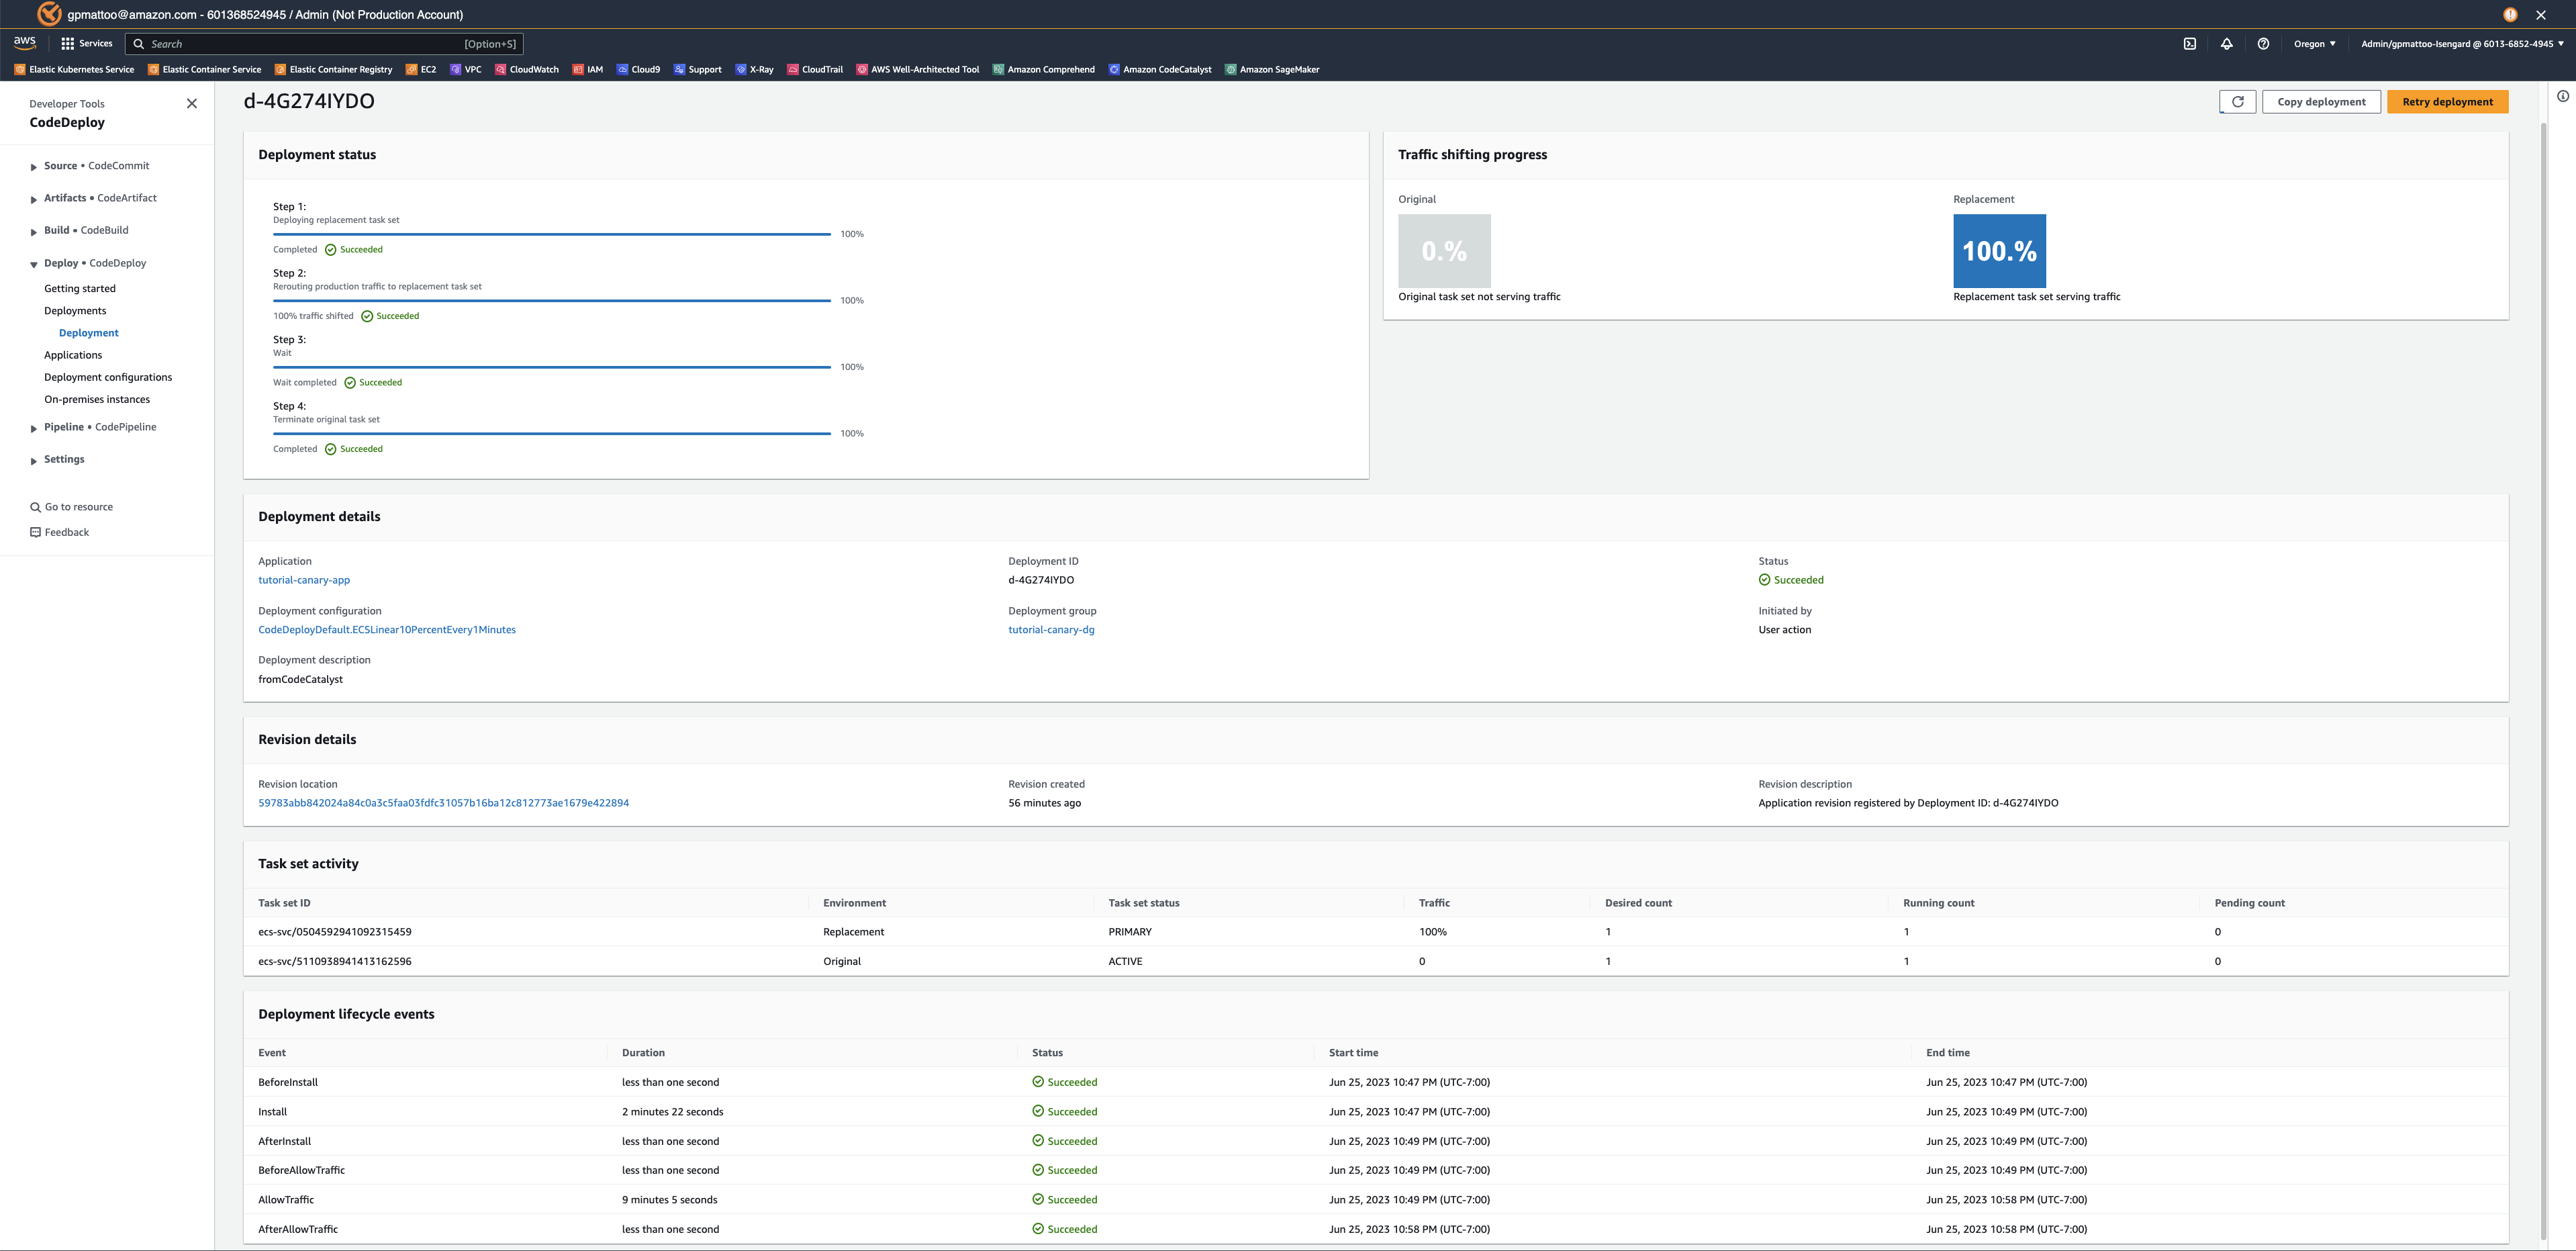
Figure 6: Blue/Green Deployment Progress on AWS CodeDeploy
Let’s review our update, using the load balancer’s URL that you created during pre-requisites, paste it into your browser. Your page should look similar to (Figure 7).
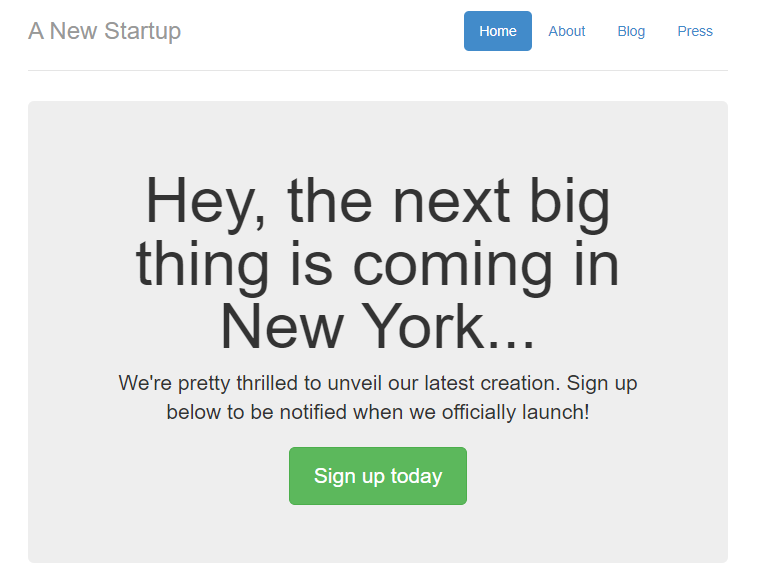
Figure 7: Sample Application (Green version)
Cleanup
If you have been following along with this workflow, you should delete the resources you deployed so you do not continue to incur charges.
- Delete the Amazon ECS service and Amazon ECS cluster from AWS console.
- Manually delete Amazon CodeCatalyst dev environment, source repository and project from your CodeCatalyst Space.
- Delete the AWS CodeDeploy application through console or CLI.
Conclusion
In this post, we demonstrated how you can configure Blue/Green deployments for your container workloads using Amazon CodeCatalyst workflows. The same approach can be used to configure Canary deployments as well. Learn more about AWS CodeDeploy configuration for advanced container deployments in AWS CodeDeploy user guide.